Yealink
To configure the Yealink phone do the following steps.
Login to the phone
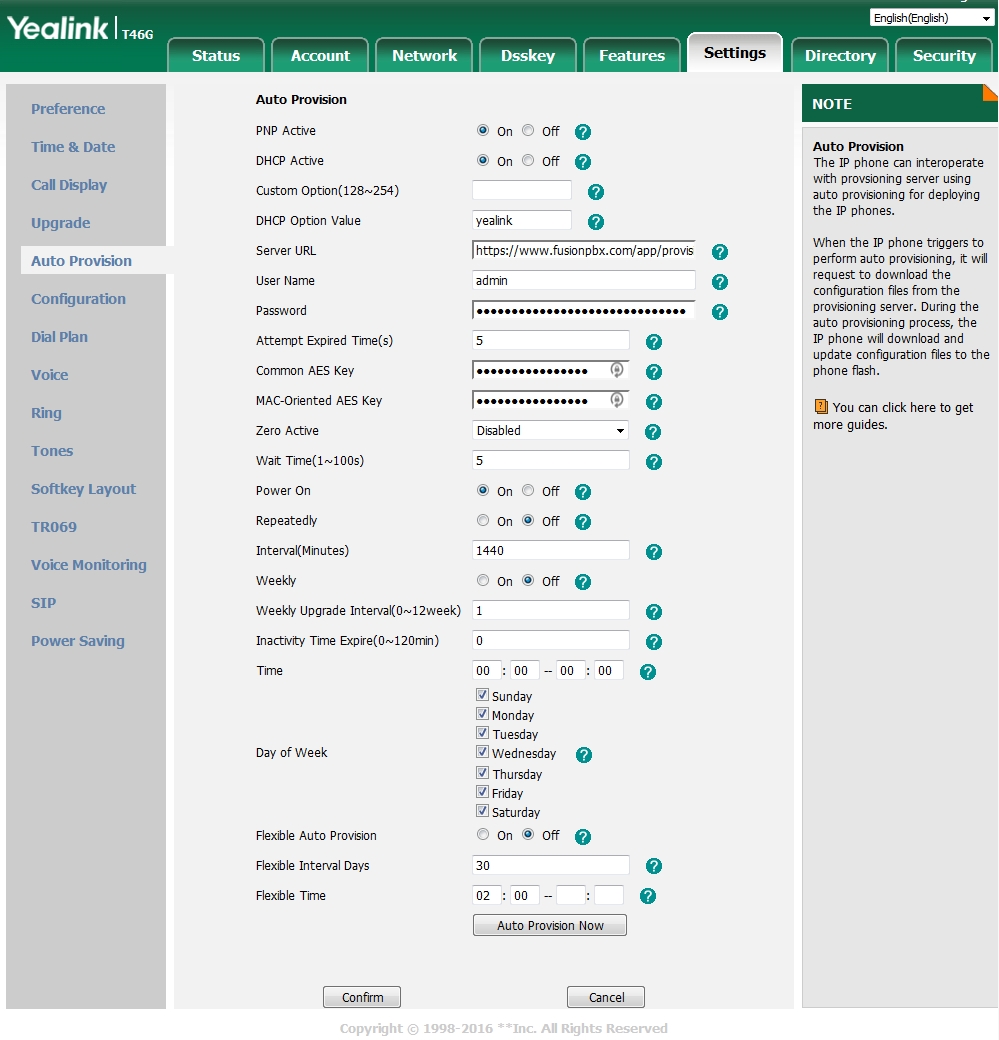
Click the Settings tab at the top
On the left vertical menu click Auto Provision
Fill in the Server URL field. This will be https://domain.tld/app/provision Replace domain.tld with your actual domain name.
Click Confirm at the bottom
Click Auto Provision Now at the bottom
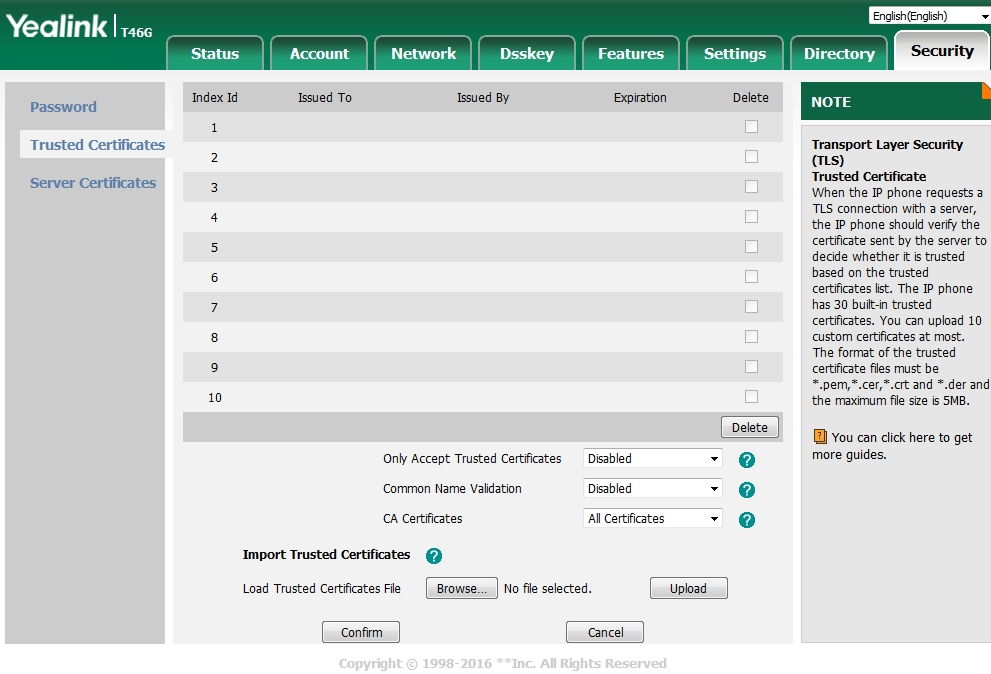
If you have a Certificate that is self-signed or not in the Yealink’s trusted certificate authority then do the following.
Goto the Security tab at the top right
On the left vertical menu click Trusted Certificates
On the dropdown box near the bottom choose Disabled for “Only Accept Trusted Certificates”.
Click Confirm
The phone will reboot and then provision using the information that was provided.