OLD Install
![]()
Please follow the link below for the newest install guide
http://docs.fusionpbx.com/en/latest/getting_started/quick_install.html
New Install Video https://www.youtube.com/embed/oioW1i8bieM
Welcome to the FUSIONPBX getting started guide. In this section we will show how to install FUSIONPBX. FUSIONPBX can be used on multiple different operating systems, databases, and web servers. In this guide we will show on Debian 8 (Jessie), Postgresql and NGINX. Please note to have a clean install. The install script will install everything but the Operating System
1. Goto a console and follow the recommended steps from https://fusionpbx.com/app/www/download.php for a standard installation. Some installations require special considerations. Visit https://github.com/fusionpbx/fusionpbx-install.sh Readme section for more details.
This install script is designed to be a fast, simple, and modular way to install FusionPBX. Start with a minimal install of Debian 8 with SSH enabled. Run the following commands under root. The script installs FusionPBX, FreeSWITCH release package and its dependencies, IPTables, Fail2ban, NGINX, PHP FPM and PostgreSQL.
Also, be sure to watch the youtube video from FreeSWITCH Cluecon Weekly https://www.youtube.com/embed/kejAxlYSW3o FusionPBX is installed and more!
wget https://raw.githubusercontent.com/fusionpbx/fusionpbx-install.sh/master/install.sh -O install.sh && sh install.sh
2. At the end of the install the script will instruct you to go to the ip address of the server in your web browser to finish the install. The script will also provide a secure random database password for you to use during the web based phase of the install. The install script builds the fusionpbx database so you will not need to use the create database username and password on the last page of the web based install.
After you have completed the install you can login with the GUI username and password you chose during the install. After you login, go to the menu and choose Advanced -> Upgrade select the checkbox for App defaults then execute.
    PostgreSQL
    Database name: fusionpbx
    Database username: fusionpbx
    Database password: PasswordSuperSecureFusionPBX

    Complete the install by by going to the IP address of this server
    in your web browser or with a domain name for this server.
    https://000.000.000.000
It can take between 2-10 minutes to install (Depending on internet speed)
- 3. Goto a web browser and enter the ip address
Go to
https://000.000.000.000
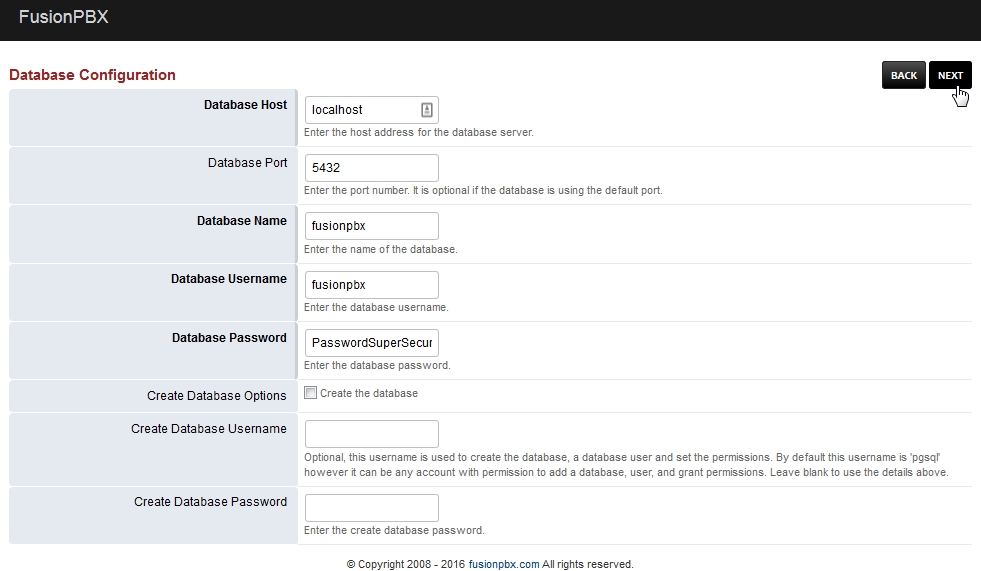
When you get to the database part choose
Postgresql
Database Name: fusionpbx
Database Username: fusionpbx
Database Password: generated_password
Create Database Username: Leave_Blank
Create Database Password: Leave_Blank
- 4. Web browser Installation part
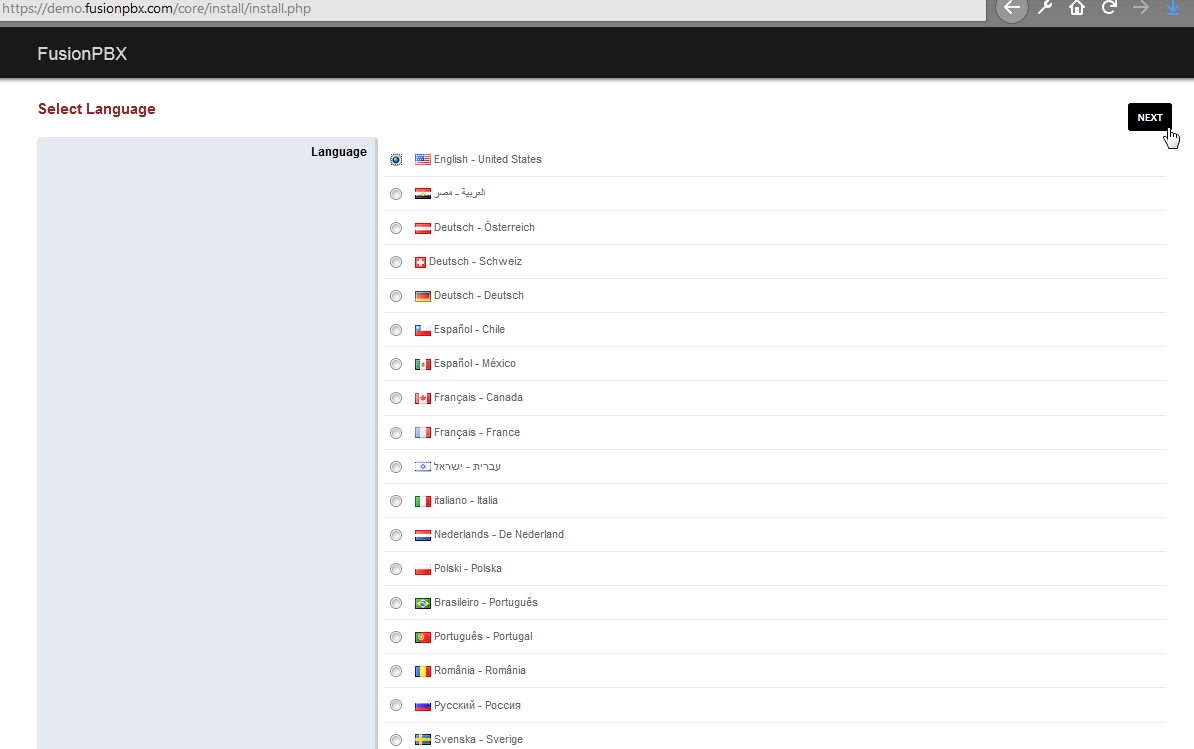
Select Language Pick your language. Click next
Freeswitch Detect Detecting folder paths used
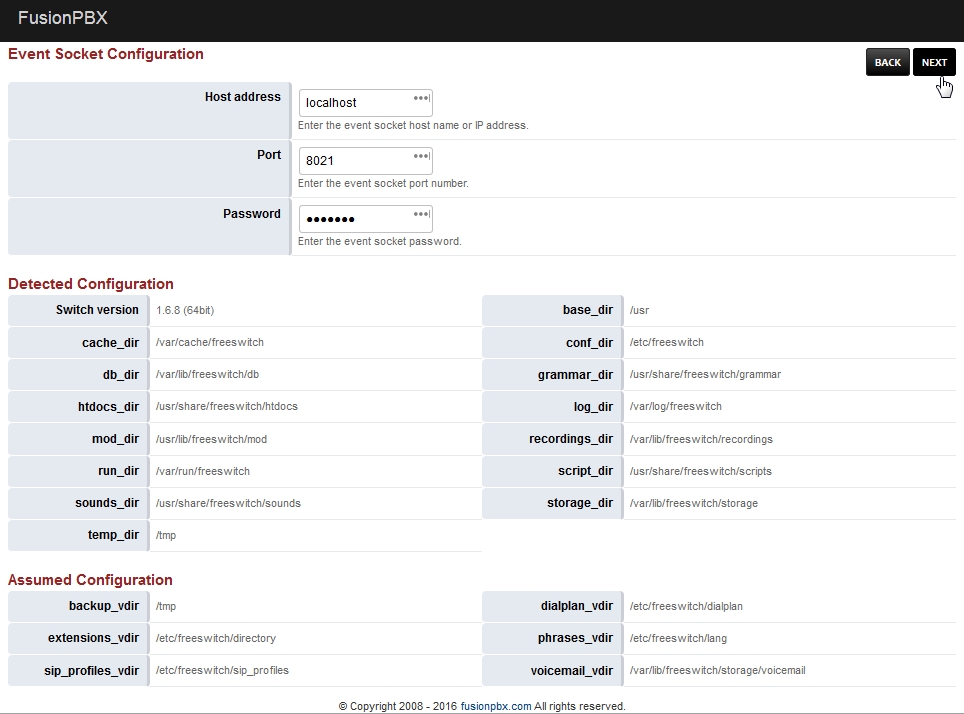
Don’t change anything here
Database Configuration Click Next
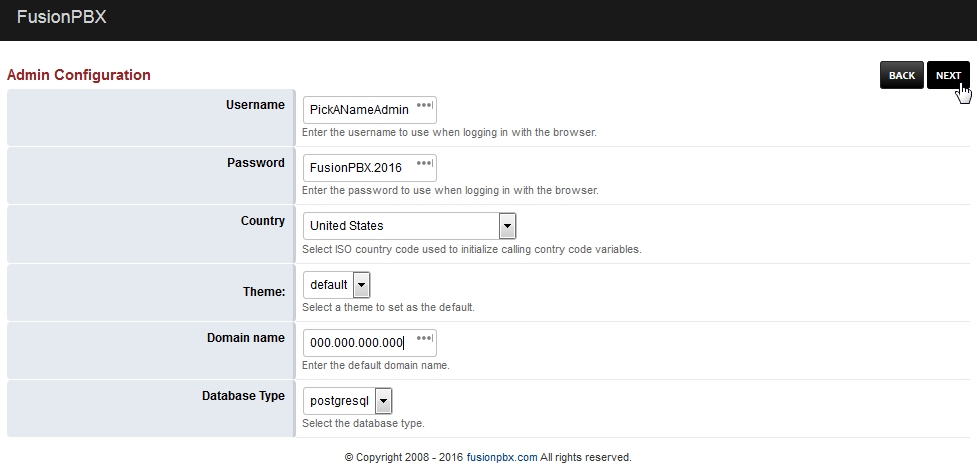
Admin Login Configuration Click Next
This will create the superadmin login that will be used in your web browser.
Install Finished Login with the username and password you choose during the install
Run App defaults
Go to the menu and choose Advanced -> Upgrade select the checkbox for App Defaults then execute.

Start Sip Profiles
Go to Status -> SIP Status and start the SIP profiles

Start Memcached
Go to Advanced -> Modules and find the module Memcached and click start.

Note: To display the logo at the top and not in the menu
go to advanced -> default settings > menu_style > set to inline
Voicemail to Email
Settings for voicemail to email and for fax notifications.
Goto Advanced > Default Settings and under the Email Section. Make
sure these settings are enabled. Once these values are set press the
Reload button at the top right of the page. :
    method         text    smtp
    smtp_auth      var     true
    smtp_from      var     username@gmail.com
    smtp_from_name var     Voicemail
    smtp_host      var     smtp.gmail.com
    smtp_password  var     *******
    smtp_port      numeric     587
    smtp_secure        var     tls
    smtp_username  var     username@gmail.com
To see if there are any failed email attempts goto Status > Emails. Once the issue causing the emails to fail is found you can click to resent them.
Note: The log is stored in the /tmp directory.