Yealink
Setting up a Yealink SIP phone through the phone’s local http management portal.
Factory reset the phone by holding down the “OK” button, found in the center of the up/down left/right buttons, until the phone prompts to Factory reset. Press the softkey for “OK” to continue. The phone will factory reset and reboot.
Once the phone powers up, press the OK button once and the phone will display its IP address on the screen. Navigate to that IP on another device in a web browser, and use admin for the username and admin for the password.
Enter the following information for each Account that is required:
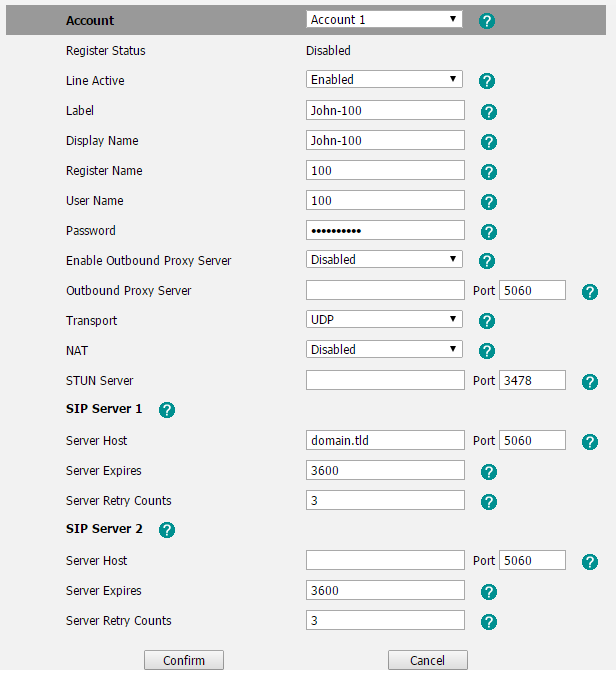
Select the “Account” tab at the top menu.
Set “Line Active” to enabled.
Set “Label” to the user’s name or the extension number, or both, ie “John-100”.
Set “Display Name” to the same as above.
Set “Register Name” to the users FusionPBX extension number, in this case 100.
Set “User Name” to the users FusionPBX extension number, in this case 100.
Set “Password” to the users FusionPBX password.
If you would like to use TCP transport, set “Trasport” to TCP.
Under SIP Server 1, set the “Server Host” to your FusionPBX domain for that extension.
Click confirm.
Click “Advanced” on the left menu.
Set “Voicemail” to *97
Click confirm.